Raspberry Pi - Lite home server
Introduction
A Raspberry Pi is a pretty nice and average priced SoC. The best thing about the Raspberry Pi is the community and software support behind it. The version I’ll be using today is a Raspberry Pi 3B (2015, v1.2) and as a little extra on top of it a FEZ Hat (Rev 1.1).
If you never owned one and you’re planning on purchasing one, check out this page for a detailed comparison between all models.
What to do with it?
I always end up having spare Raspberry Pi’s laying around from Hackathons or all sorts of giveaways or purchased from older projects. The Raspberry Pi is not necessarily the most powerful SoC on the market, but the performance/price ratio results in a value product.
In this post I’ll be covering the following:
- Headless start (no keyboard and no screen)
- SSH Server (with key auth)
- Starter packages
- Other generic & utility stuff
- Environment setup (shell, aliases, …)
- PiHole (to disable all the nasty adds on all devices)
For the time being these simple initial setup steps will do. In future posts I’ll be covering in more detail other projects I have in store for the Raspberry Pi. For example:
- Who is home (by scanning the network)
- Ambient logging (using the Fez Hat)
- Web server and API
- File-dumping server
- Front door camera
- With web feed and alerts
Setup
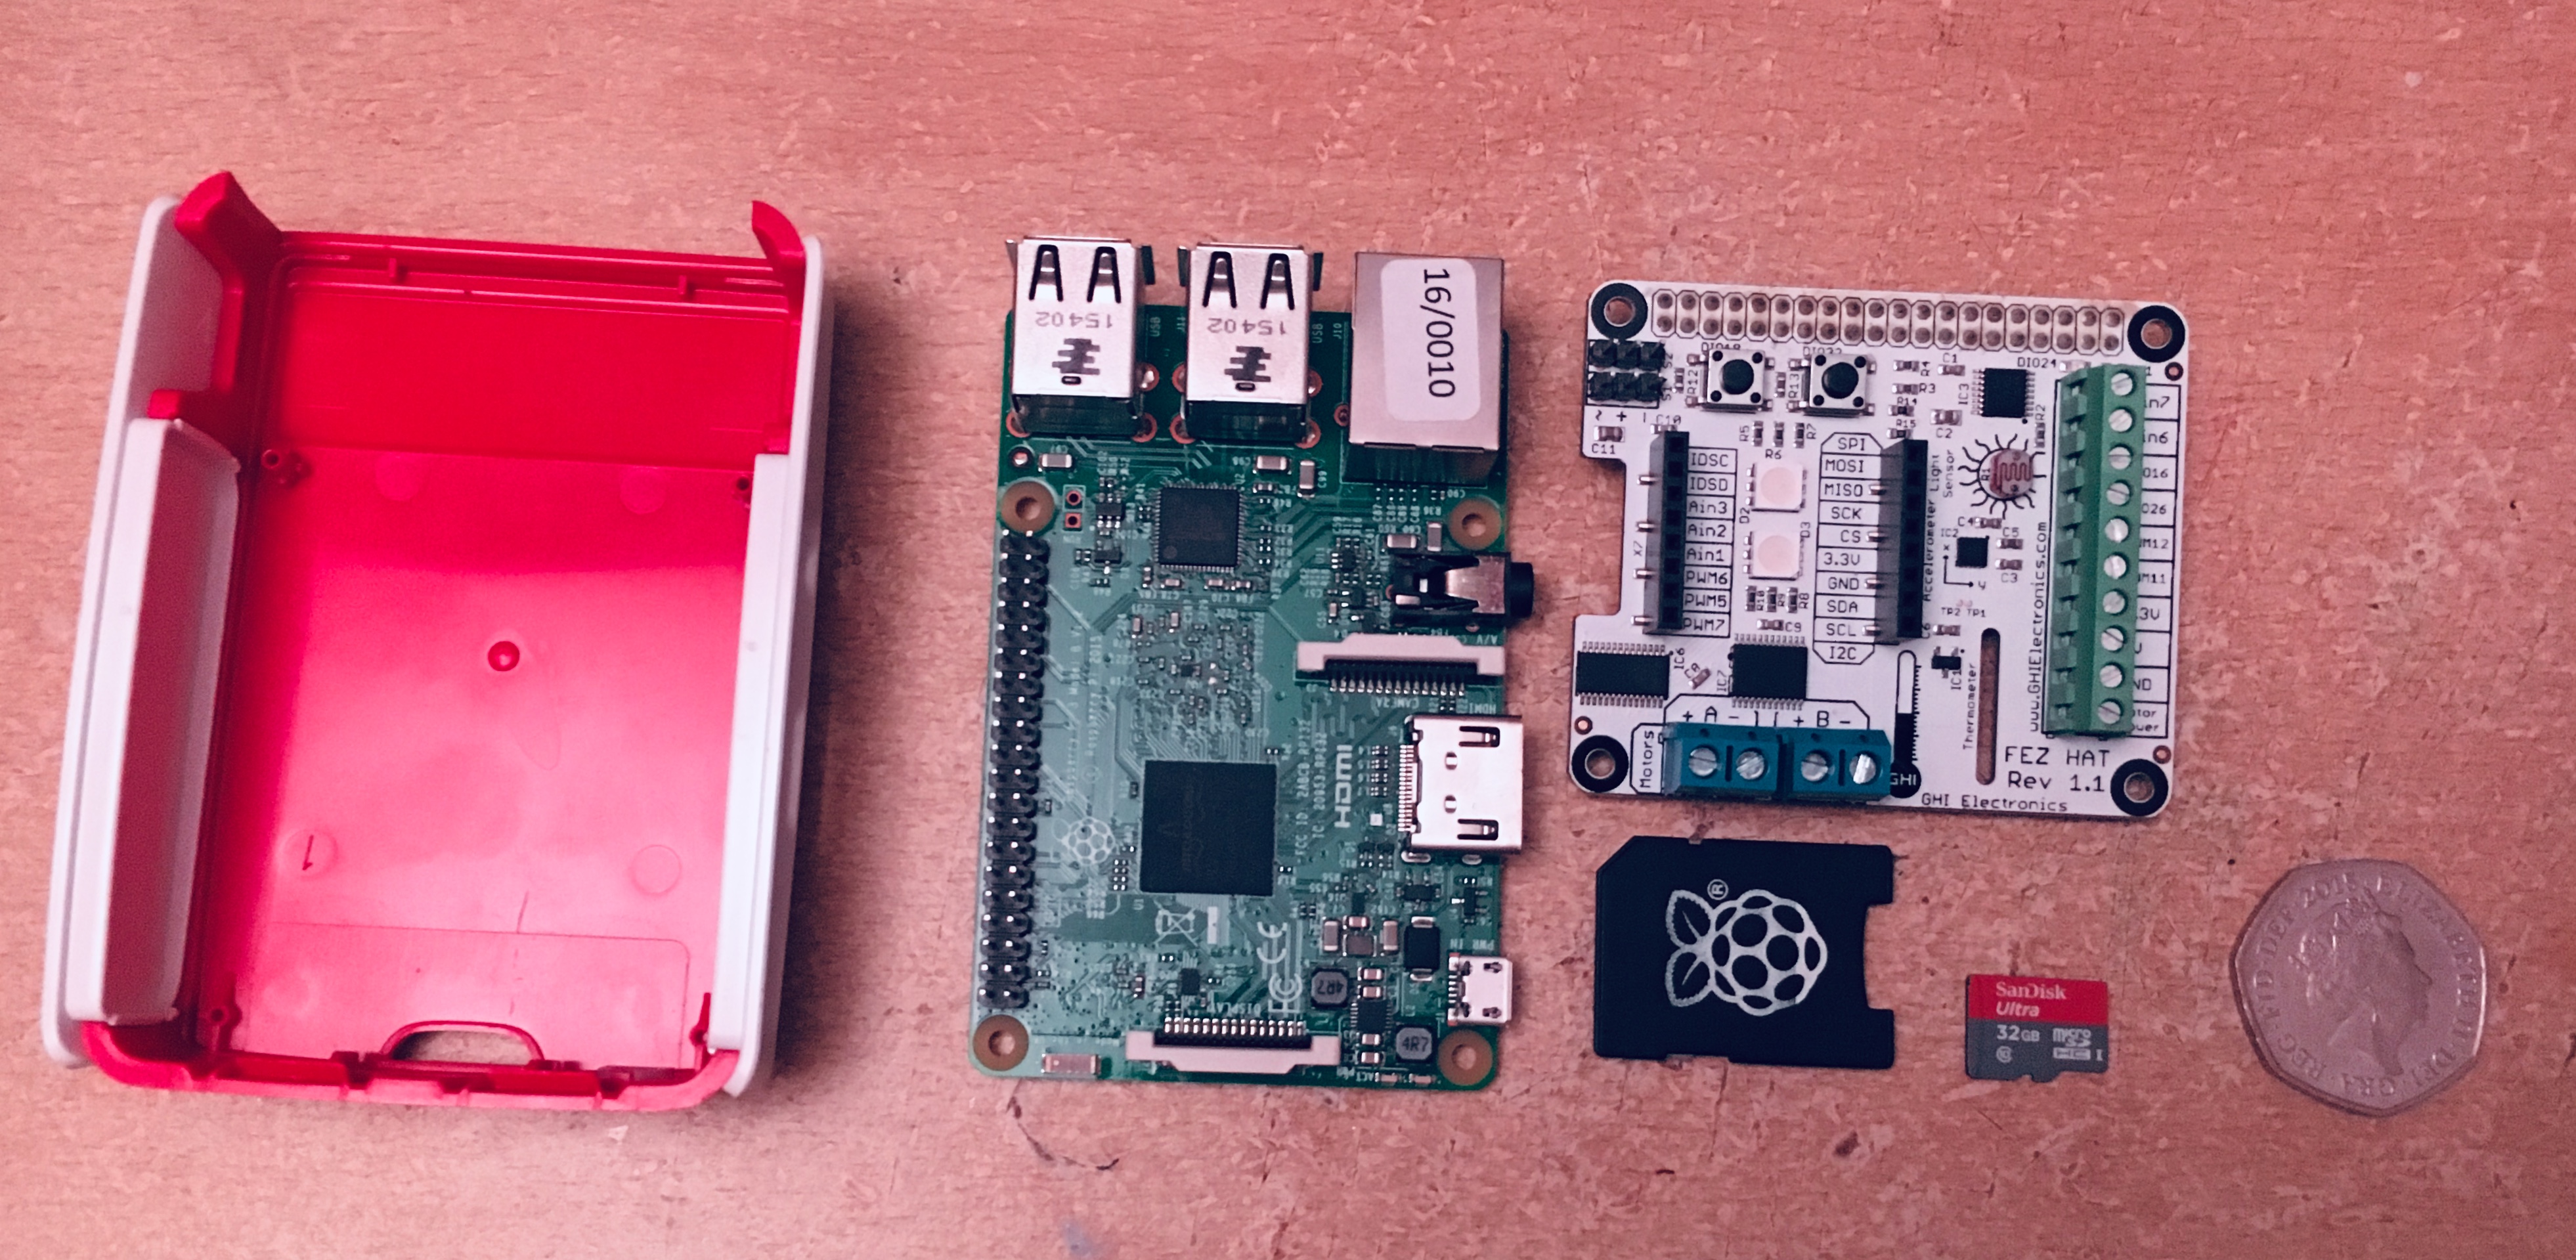
You’ll obviously be needing a Raspberry Pi (pretty much any model works), a power supply (make sure it’s ~5.1V and between 0.5-1A depending on the connected peripherals), a microSD card and a means of connecting it to an already functional machine.
On the software side, you have to download an Operating System for the Pi, my personal recommendation is Raspbian (a Debian based OS, with plenty of software and great community support) or you can see a list of supported OS-es here.
Now that you have the image (.img) of your choice of OS, it’s time to “burn” it onto the microSD card. For this you’ll need special software on your master machine.
- Etcher - macOS
- Win32DiskImager - Windows
- Linux, you can figure this out
After the microSD is ready, you should see a mounted media called /boot. Upon entering it a series of files will be located, the most important of these files are:
- The Firmare (split across most of the files)
kernel.img(the kernel of the operating system)config.txt(this is used the VideoCore to initialise the system)- It’s advised not to mingle in here unless you know what you’re doing
At this point we are not yet done with the microSD, inside the /boot/ directory create a file named ssh. Yes, an empty file. (touch ssh when inside the directory). This will allow you to connect using the default user (pi with password raspberry) over ssh.
Another thing you might want to do is setup a WiFi connection for your Pi. This can be achieved by creating another file called wpa_supplicant.conf. In which you’ll have to write a config like this:
country=<2 LETTER COUNTRY CODE>
update_config=1
ctrl_interface=/var/run/wpa_supplicant

network={
 scan_ssid=1
 ssid="<NETWORK SSID, NAME>"
 psk="<NETWORK PASSWORD>"
}
I don’t really like the hassle of dealing with WiFi before having access to the system and I always have access to an ethernet cable, but in case you don’t, that’s all you need to do.
Let there be light
Now your Pi should be ready to boot. Safely remove the microSD from your machine, place it in the Pi (make sure there his no power source connected to it), plug in the ethernet cable and then the power cable.
At this point you should have a red light on (telling you that power is present) and a green LED (the ACT LED) telling you the operating system it doing its thing.
Time to connect to your Pi. If you created the ssh file inside the microSD /boot directory, you should now be able to run the following command ssh [email protected]. This command may not work on some networks as the hostname lookup might not work or other pi’s might be present on the network. To be sure your machine is even connected to the network perform a network scan an use the IP directly to connect (nmap --help).
When sshing into your Pi, you will be promoted to type a password, as we mentioned above the default password for pi is raspberry.
Tada! Now change that default password so you don’t expose yourself to unwanted intruders later down the road. Do this by typing passwd. A prompt will ask for your current password and then the new password + a confirmation.
Changing password for pi.
(current) UNIX password:
Enter new UNIX password:
Retype new UNIX password:
You should probably also change the password for the root user. sudo passwd root, but make sure you don’t forget this one. And to be extra safe no root incidents happen, lock the account using sudo passwd -l root.
raspi-config
A great utility tool that comes with Raspbian is raspi-config. You can run this as sudo raspi-config and a nice curses gui will appear. From here you can do the initial setup of your Pi.
- Go to 2 Network Options > N1 Hostname
- Change the hostname from
raspberryto something more meaningful. I like using the periodic table for labelling my machines (more on this on a different post).
- Change the hostname from
- Go to 4 Localisation Options
- Change your Locale, Timezone, Keyboard Layout to your preferred style
- Go to 7 Advanced Options > A1 Expand Filesystem
- This will ensure that all of the microSD space is used
- Click Finish and agree to having your system rebooted
Next time you’ll be logging in over ssh remember to use your new password.
Update time
The version of the OS you got definitely contains outdated packages and you should almost always update. This is done by using apt-get on any Debian/Ubuntu OS-es.
Before starting this, make sure your Pi is connected to the internet and power and the chances of these two getting disconnected is as close to 0% as possible.
sudo apt-get update
sudo apt-get update
Now depending on your internet speed, how many packages must be updated and the mercy of the E͕̣͇l̹̖̙̯̬̫̗ḏę̻̭̺̜̜̹r͇͈̯͓ ̧̜G̨͍̮̺̦̳͕͓o̴̮͎d̤͖͈s̵̠̞̲̺̝, this may take a while so go make a tea or something.
Just to be safe run the commands above again! Don’t play around with package managers, they can make your life easy but they can also make it a living nightmare.
After the updates are done and the Universe hopefully didn’t reach Heat death by that point, you can safely reboot your Pi (sudo reboot). And connect to it again after it boots.
Goto packages
On pretty much any system I setup or own I want to have the following packages:
ufw- Nice and simple firewall rule management, allows you to block undesired connections (such as your housemates trying to DOS you :) ).sudo ufw allow 22- sshsudo ufw allow 80- httpsudo ufw allow 443- httpssudo ufw allow 53- dnssudo ufw allow 123- ntpsudo ufw default deny incomingsudo ufw default allow outgoing
htop,iotop,iftop- Monitor different resources on the Pivim- Not meaning to start any wars here, but how can some people useemacs, right?gitgolang- I’ll be using it to create the web/network projects/tools.
To install a package use sudo apt-get install <package name>.
Secure Secure-SHell
The default login authentication method for ssh is password or key. A more secure way of dealing with ssh is by enforcing key only auth (this renders any brute forcing or dictionary attacks useless).
Before we enforce key auth only, we should make sure key auth works, with the password as a safety net.
Generate yourself a ssh key or use an existing one. This step should be done on your master machine, or you’ll have to transfer the private key from the machine. To generate a key run ssh-keygen, when promoted for a file to save the key in use the default one, then type in a strong but easy to type and remember password.
Inside your ~/.ssh/ directory you should now have a private key id_rsa and a public one id_rsa.pub. NEVER SHARE YOUR PRIVATE KEY. Inside the ~/.shh/ dir, create a file called authorized_keys and inside it you can paste the public keys which are allowed to connect to this machine and user using their respective private keys (each line can be a public key).
Now exit/close the ssh connection and then try to log back in, this time if you properly configured your ssh keys (this is a topic that goes beyond the purpose of this post), the Pi shouldn’t prompt you for any password. If this is the case, you can now disable password auth.
In order to change the sshd configuration, type sudo vim /etc/ssh/sshd_config (or nano) and modify the following lines:
PasswordAuthentication no
LoginGraceTime 1m
Other settings might look interesting, such as changing the default listening port. Feel free to look around and modify it to your liking. But beware, playing with sshd configuration can leave you locked out of your system, forcing you to start over (or mount the filesystem and change the configurations).
MOTD
Message of the day, is the message which shows up whenever you login. By default on a Raspbian machine that is:
The programs included with the Debian GNU/Linux system are free software;
the exact distribution terms for each program are described in the
individual files in /usr/share/doc/*/copyright.

Debian GNU/Linux comes with ABSOLUTELY NO WARRANTY, to the extent
permitted by applicable law.
And it can be changed by editing /etc/motd. I like putting some ASCII ART in there just to cheer me up (might work on a “auto updating” MOTD with ASCII art, that would be awesome and probably someone already did it).
ZSH
Having a well configured shell is more than just the looks, it helps you navigate your system faster and more efficiently. A shell package like oh-my-zsh gives you out of this world auto-completion, highlighting and utilities.
In order to install it:
sudo apt-get install zsh, first install the zsh (shell)sh -c "$(curl -fsSL https://raw.githubusercontent.com/robbyrussell/oh-my-zsh/master/tools/install.sh)", and then download and execute their install script
For more details on configuring it, check out the projects repo page on GitHub.
PiHole
With this I’ll try and tie things up as this post is already a blob of text and ramblings. Pi Hole is a cool little project that acts as a DNS for all the devices you want to connect to it, filtering out known advertisers DNS queries and then keeping these that interest you. It has a nice dashboard to view all the stats of your usage.
It has a simple setup process, only requiring you to execute the following:
curl -sSL https://install.pi-hole.net | bash
And then allowing you to configure some very basic things.
Wrap up
With all of the above in mind and hopefully you looking forward to some more well planned posts about different projects I’ll be working on in the upcoming months, I hope this helped to some degree. The Raspberry Pi is a fun little tool that is both good for learning and real-world applications. Be creative and learn as much as you can on this simple, controlled environment while at the same time setting up all kinds of useful projects.
Don’t
While a Raspberry Pi might look like a nice little powerful thing. It’s not. Sure there are plenty of nice and ingenious projects you can put together using one, and plenty of production-grade software available for it, this doesn’t mean you SHOULD do X. I’ve heard plenty of unfeasible ideas and even tried out some myself just to be disappointed. Use your head and don’t stop at “Can I do X?” but also ask “Should I do X?”.
Sure you can run a Kubernetes cluster on 10 Raspberry PIs, but should you?
No, you shouldn’t.